Gantt Tab:
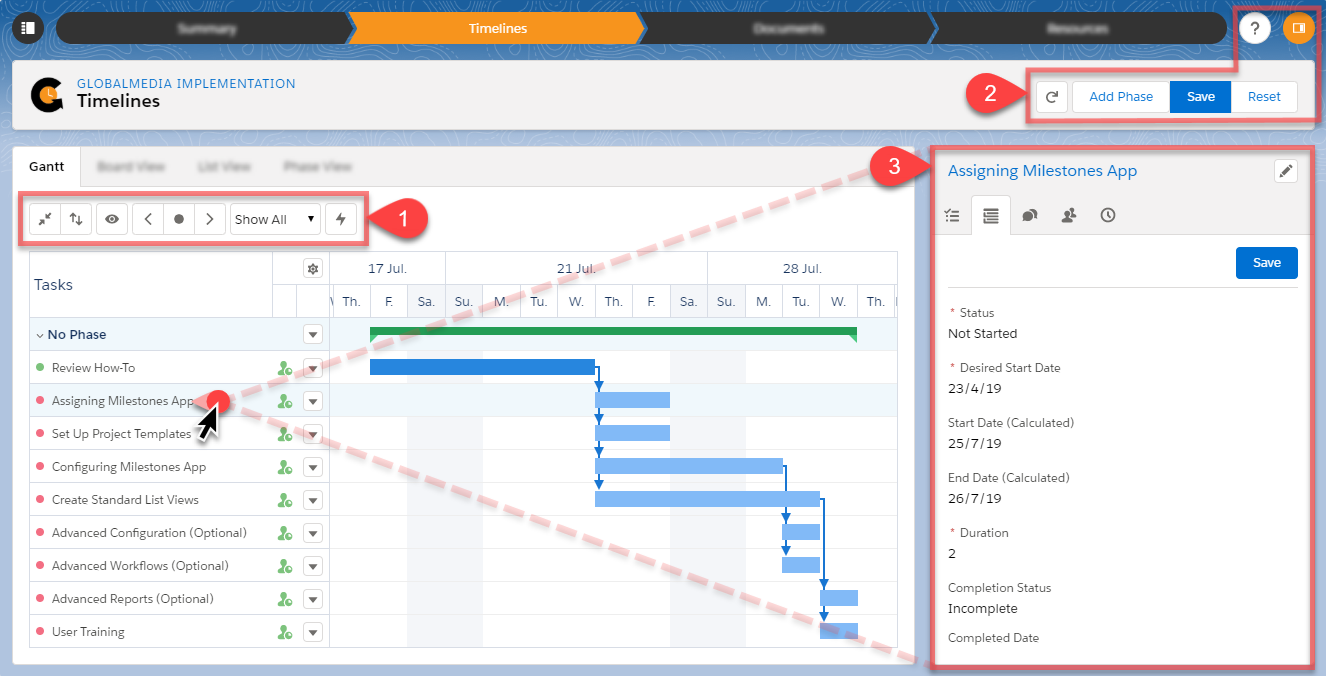
1. Gantt: Project schedule in timeline view. Create dependent relationships between tasks by clicking and dragging from the end of one task to the start of another in the Gantt.
–  button- Expand/Collapse phases
–  button – Sort tasks by Date or Name, Ascending/Descending
–  button – Gantt display options: Fit (default), Days, Weeks, Months, Years, or Quarters
–  buttons – Scroll in time; back, today, and forward
–  menu – Select task filters; Show all (default), In Progress, Late, Upcoming tasks
–  button – Show critical path
Next to each project task is a drop down menu which provides users with the option to Add and Delete tasks, as well as delete dependencies.
2. Timelines controls:
–  /
/ – Collapse/Expand cross project view list view side panel
–  icon – Refresh body of project
– Add Phase: Add phase with tasks to project
– Save: Saves changes to project (example, add task, add phase, modify dependencies)
– Reset: Does not save changes to project, reverts to last saved version of project.
3. Click to select Task to view in side panel: Sub Tasks, Details (edit using  icon), Chatter, Resources, and Time Entry)
Phase View and Task View tabs:

4. Board View: Tasks in Kanban view
– Click to select Task to view details in side panel: Sub Tasks, Details (edit using icon), Chatter, Resources, and Time Entry)
– Drag/drop Tasks into columns: Not Started, In Progress, Competed, On Hold
– Dragging a task into a new column will result in the following updates to the Task’s Completion %:
0% = Not Started
1-99% = In Progress
100% = Completed
– Search for a specific task or view status
5. List View: Lists tasks in project without phases
– Click to select Task to view details in side panel: Sub Tasks, Details (edit using icon), Chatter, Resources, and Time Entry)
–  : Filter by field using Quick or Advanced Filter options
– Multiselect/edit capability
– Sort by column header
6. Phase View: Lists nested Tasks w/in Phases
– Click to select Task to view details in side panel: Sub Tasks, Details (edit using icon), Chatter, Resources, and Time Entry)
– : Filter by field using Quick or Advanced Filter options
– Add dependencies in the Dependent Upon column by dragging a task by number or searching for a task by name
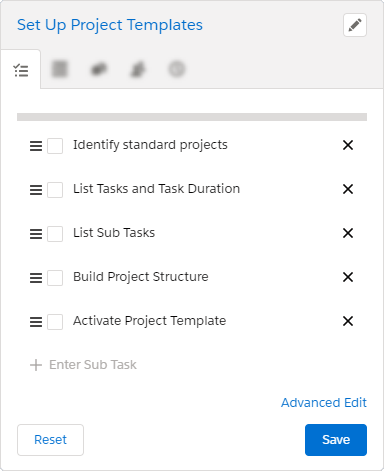
Project Managers can update and manage Project Tasks using a management panel on the right side of the Project Gantt. There are five separate tabs in the management panel:
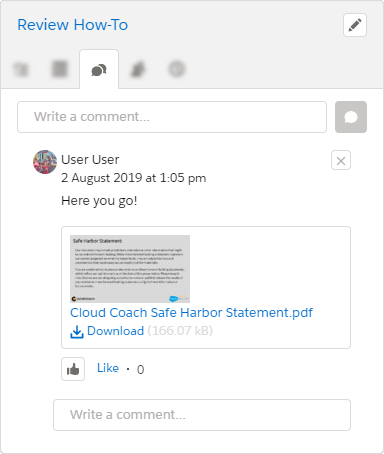
![]() Sub Tasks | Details | Chatter | Resources | Time Entry
Sub Tasks | Details | Chatter | Resources | Time Entry
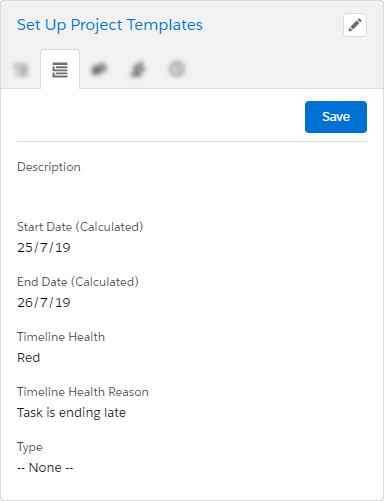
DETAILS
The Details tab displays pertinent Task fields found on the Task detail page. Fields in this set can be added and removed by an administrator. Depending on the permissions of the user and the type of field, standard and custom fields that have been added to the field set can be manually edited directly in the panel. Record Types are supported.
Fields that are editable have a ![]() icon to the right as when hovered over. The user can make changes to the fields on the fly.
icon to the right as when hovered over. The user can make changes to the fields on the fly.
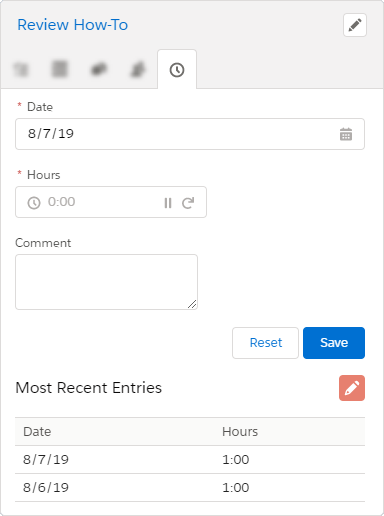
RESOURCES
Users and Contacts can be assigned to tasks in a project. Search by First or Last Name on a per task basis for a specific user and select them for the task assignment. Multiple users can be assigned to a task.
- Assigned – shows the name of the assigned Users and Contacts or “No Current Assignments”
- Add New – Select Users or Contacts to search by name for a resource. Click to select for assignment.
 /
/ Favorite Resource Flag – Click icon to flag/unflag a resource for display in the “Favorites” section.
Next Steps:
Have questions? Attend our live forum! Register to attend
Read Article: Project Creation
Read Article – Cross Project View
![]()
Leave A Comment?