Overview
What is the External Project View (EPV)?
- A live, read only URL that can be provided to anyone with a web browser displaying the latest information pertaining to your Project.
- A Cloud Coach and/or Salesforce license is not required to view the link.
Why use the EPV?
- Keep external stakeholders, sponsors, or clients informed with the latest data related to the Project.
- Create trust with your clients by providing transparency with your progression.
- Save time by providing data that would otherwise be a meeting or email correspondence.
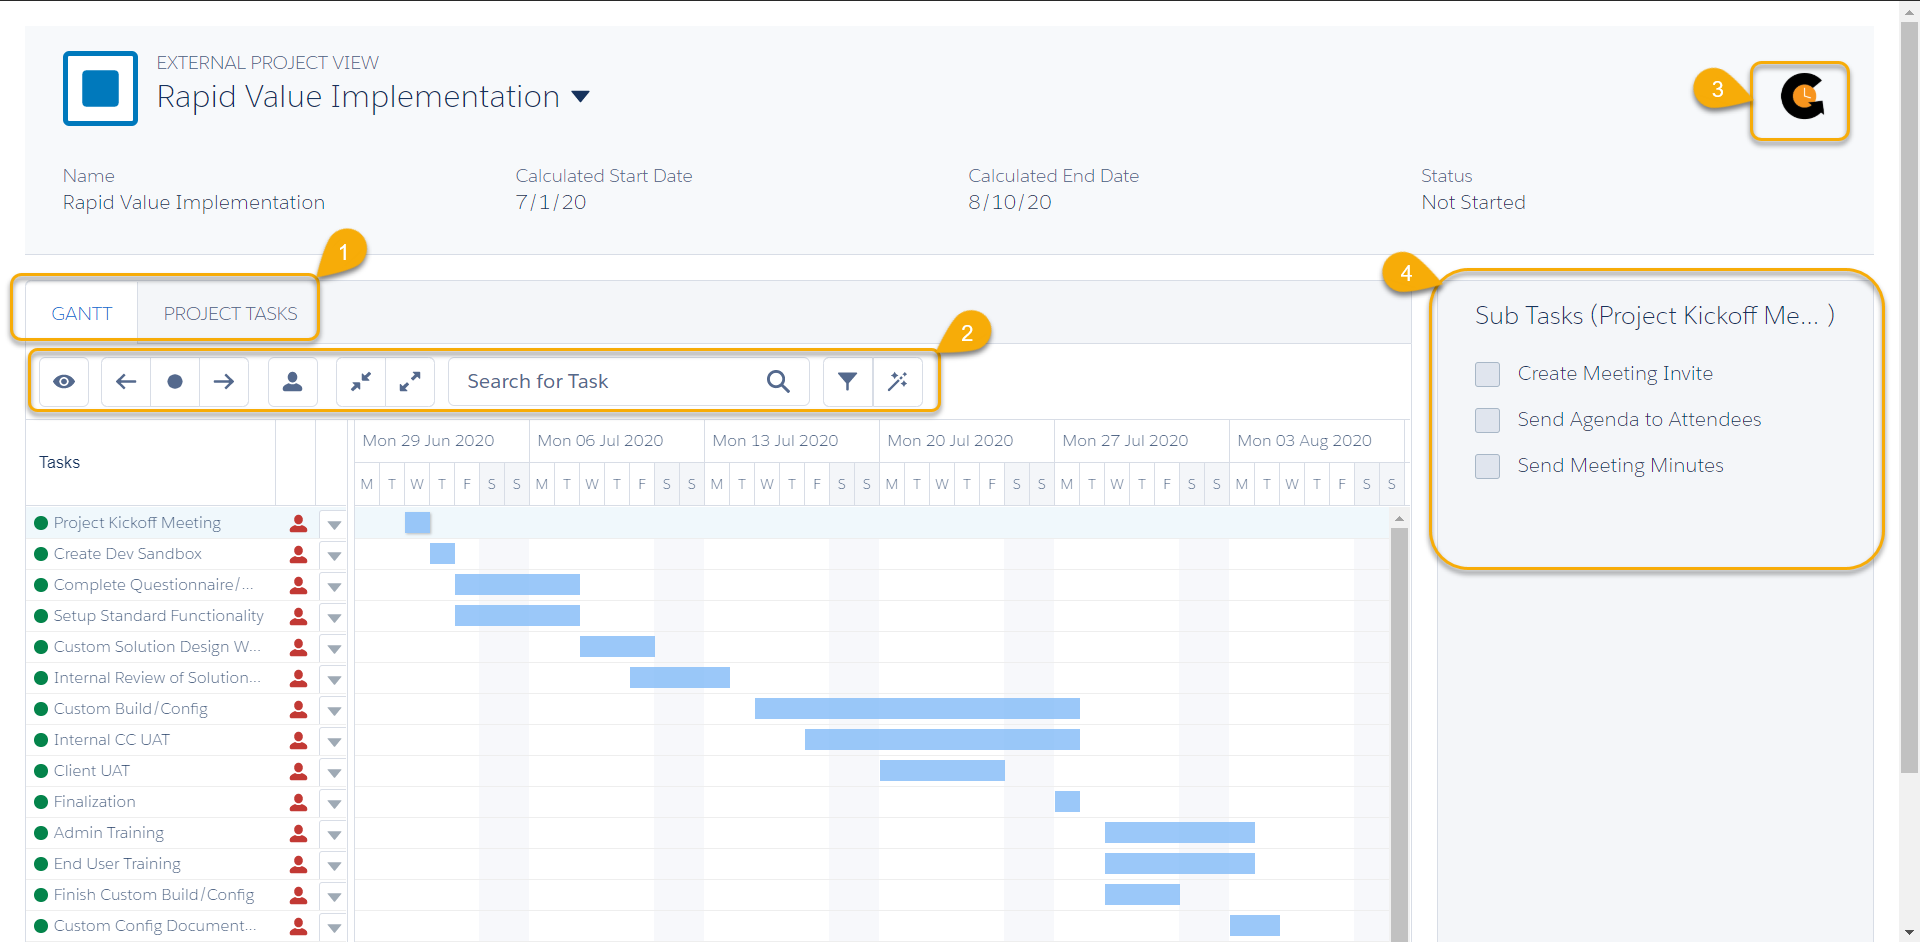
The External Project View includes tabs for Gantt and Project Tasks as well as Sub Tasks in the side panel so different team members can see the information that is most relevant to them.
1. Gantt and Project Tasks: Displays a Gantt (timeline) or list view of Tasks based on their start date, task duration, and dependencies. Users can move between tabs to find different types of information. Configurable by the Site field set on the Project Task object: Configure External Project View List Tab
2. View Settings: The Eye icon changes the Gantt display to fit, week/day, month/week, or year/month. The left scroll arrow scrolls to the first Task. The right scroll scrolls to the last Task. The circle button scrolls to today. The person Icon will show who the assigned resources are for the Task. Use the search field to locate a specific task and click the filter icon to create custom filters. The Wand button will show the project’s Critical Path.
3. Add your Company Logo: Custom page branding can be added. Image recommendations: square, transparent background image.
4. Sub Task Side Panel: The Side Panel will display any Subtasks for each Task. The checkbox indicates that a Subtask has been marked as complete.
**PLEASE NOTE: The Show in External View field allows tasks to display on the External Project View. It is a checkbox that defaults to TRUE or FALSE in different situations. These are the default settings and circumstances:
- Default setting for projects and templates created before External Project View is implemented:
Show in External View field = FALSE. This field needs to be exposed and checked for each task individually to display on the External Project View. Users may need to modify templates and update this field for each task in the template in order for future projects to display desired tasks. - Default setting for new projects and templates created after External Project View is implemented:
Show in External View field = TRUE. The field does not need additional changes to ensure the task displays on the External Project View. Users may need to modify templates and update this field for each task in the template/project in order to remove desired tasks from display on the External Project View.
Create Permission Set
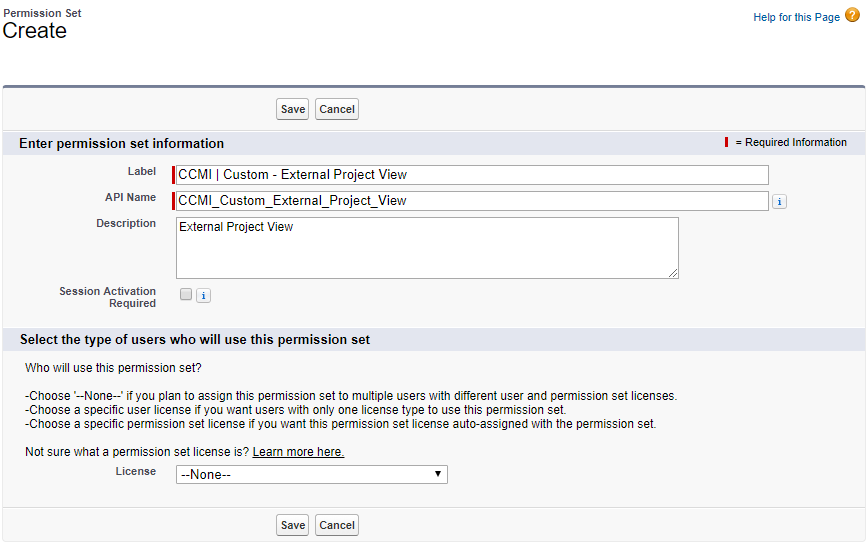
1. Setup → Users → Permission Sets → New
Create a Label and Description for the Permission Set using the following label:
Label: CCMI | Custom- External Project View (the API name will auto populate).
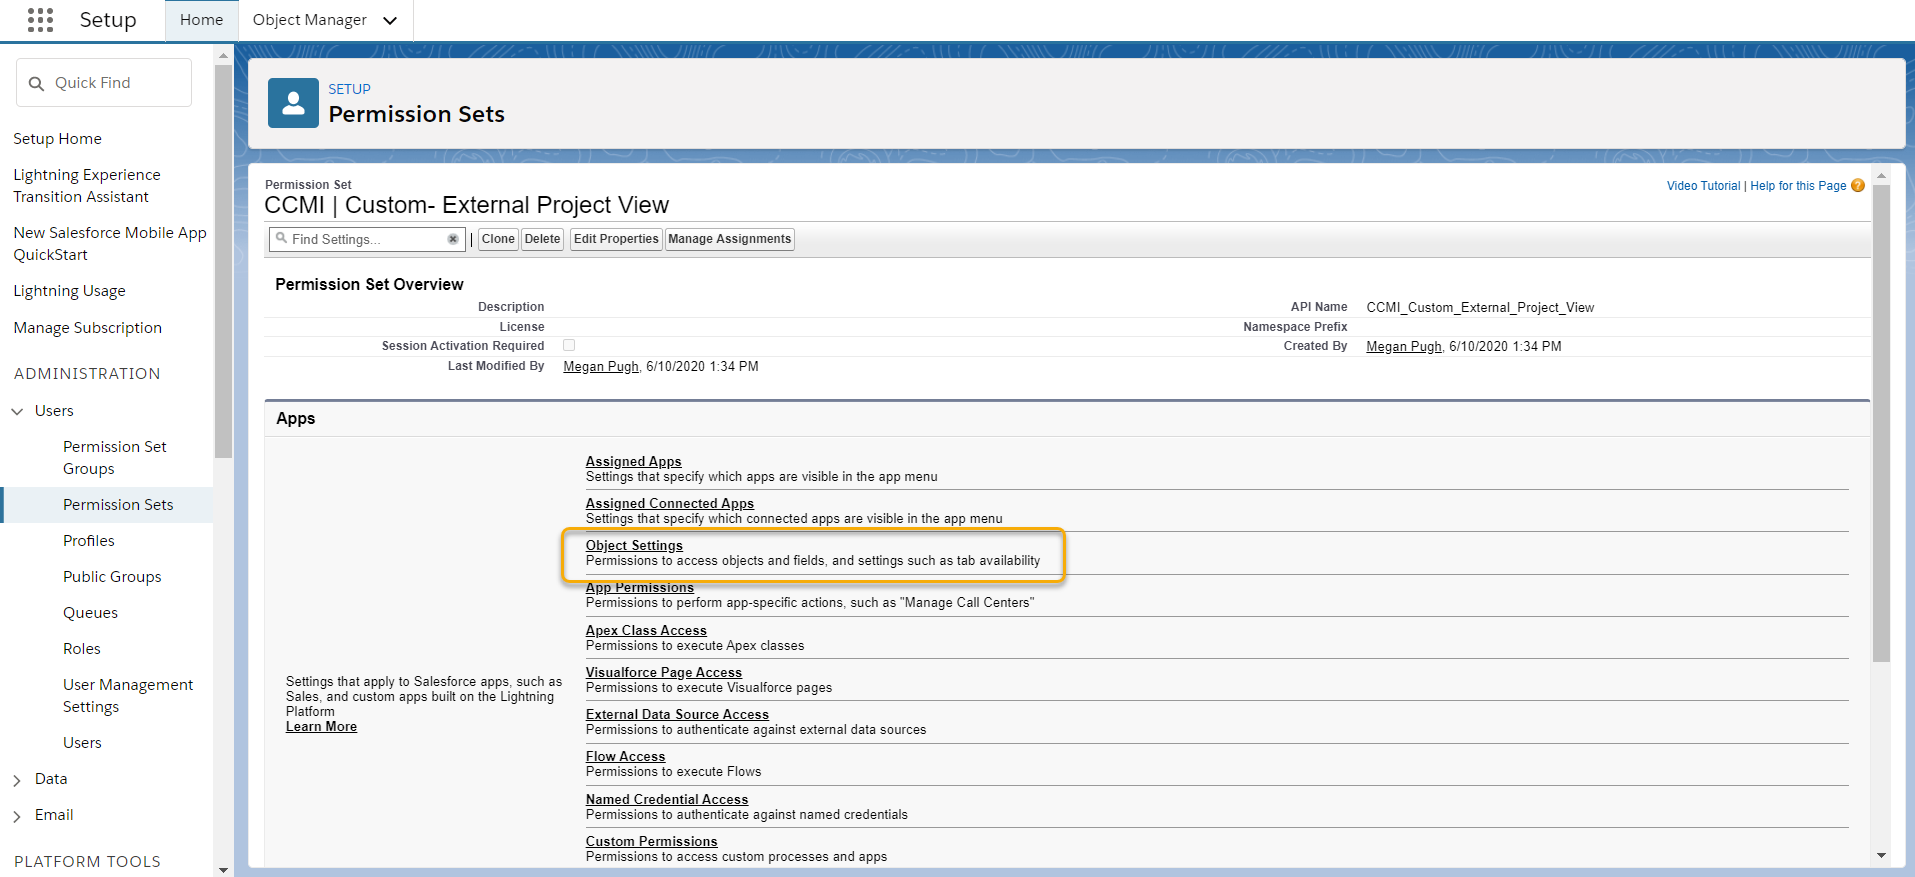
2. After creating the Permission Set, you will be taken to the overview page. Click “Object Settings” to add the Objects and Fields you would like exposed in the External Project View.
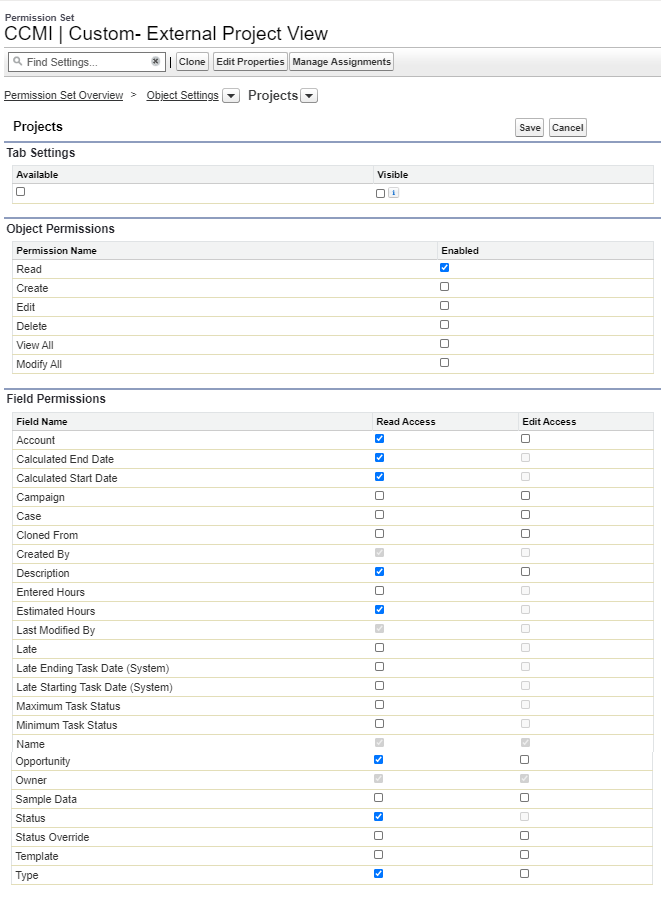
Example: The Project Object is probably the most important Object in Cloud Coach to grant access to, so we will start with that for our example. After selecting Project from the Object list, click Edit and choose what Fields on the Project Object you would like to be externally visible.
Because the URL is read only, you will only need to grant read access to Objects and Fields. Granting edit access will not grant any additional access.
Create Site
After finalizing the Permission Set access, the page itself needs to be creating by creating a new site in Salesforce.
In this step; create a Site for the External Project View, Activate the Site, Add Permission Sets, and Assign Licences (if working in a Production Org).
1. Setup → User Interface → Sites → New
Fill in the details from below:
- Site Label: External Project View
- Site Name: External Project View
- Site Contact: Your System Administrator
- Active: Check
- Default Web Address: externalprojectview
*Copy the full URL to your clipboard for the next section. We will need to add it to the URL Field. - Active Site Home Page: project_view_readonly
- Inactive Site Home Page: In Maintenance
- Site Template: SiteTemplate
- Cloud Coach recommends selecting the Require Secure Connections (HTTPS) for security purposes.
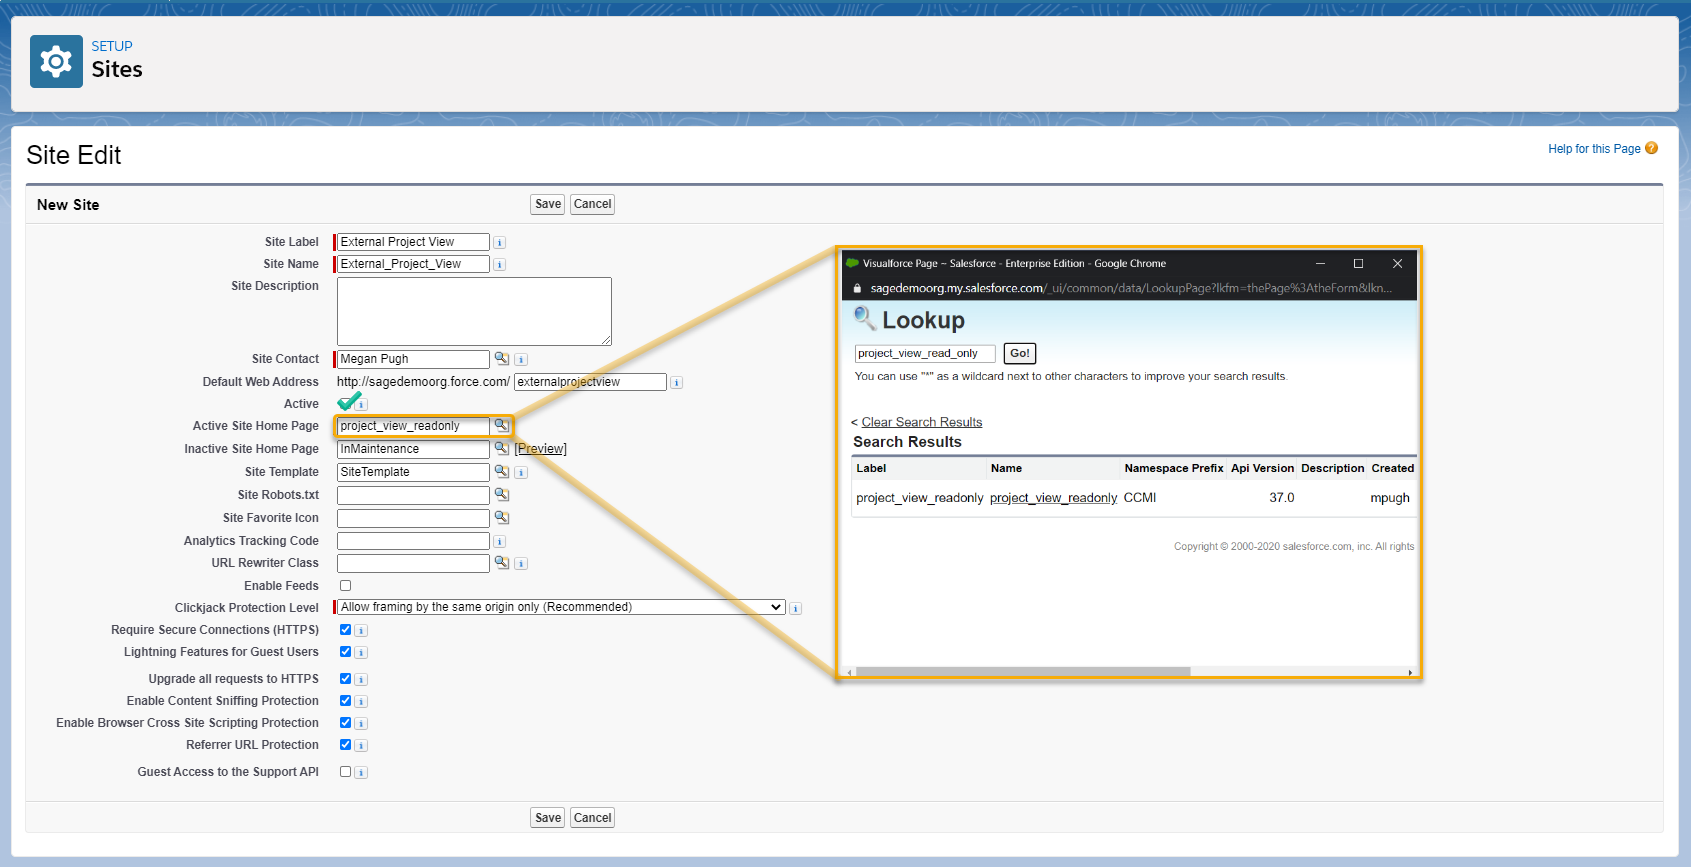
Click Save.
2. Setup → User Interface → Sites and domains → Sites → External Project View (Edit)→ Public Access Settings → View Users → Site Guest User
Confirm Guest User is Active
If the Guest User is not Active:
- Click Edit
- Set Active to True
- Click Save
Assign Cloud Coach License*
- Under Managed Packages, click Assign Licenses
- Select Cloud Coach Professional
- Click Add
Assign Permission Sets
Permission Set Assignments → Edit Assignments
Assign the following Permission Sets:
- CCMI | Minimum User Permissions
- CCMI | Custom – External Project View
*Licences are only eligible for assignment in a Production org,l so if you are working in a sandbox, you can skip this step.
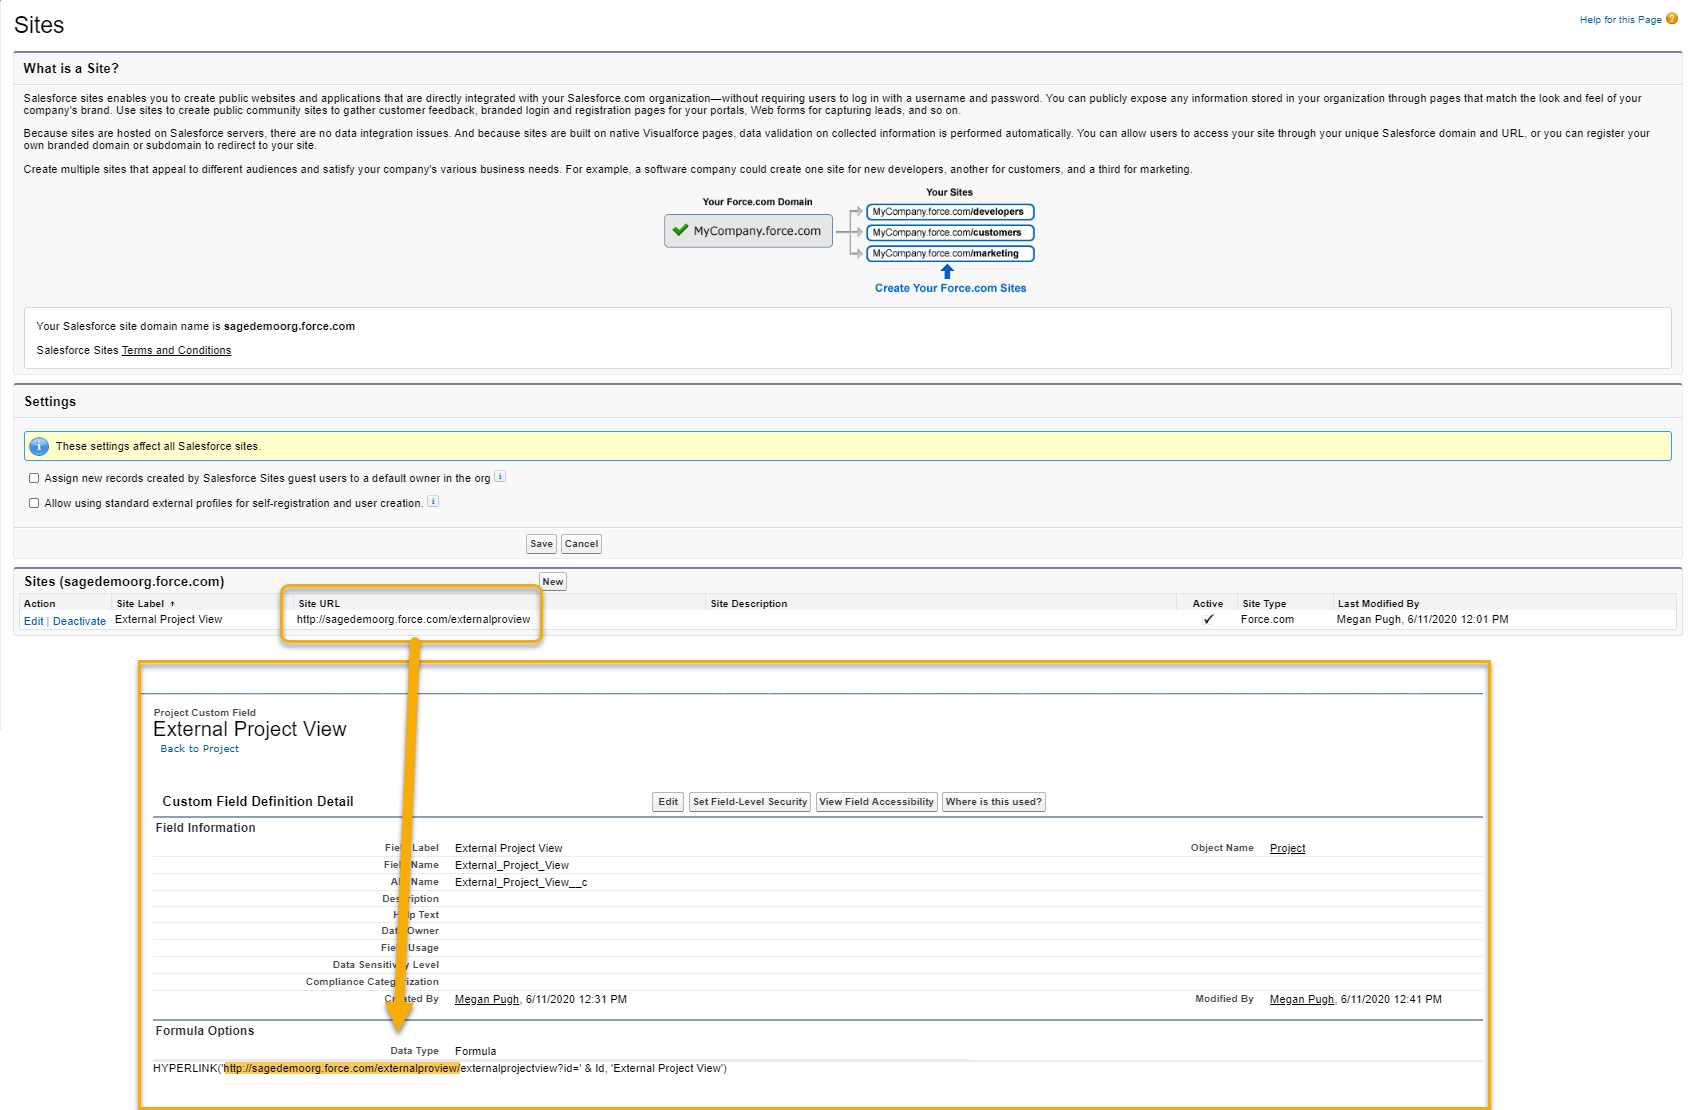
Create URL Field
In this section, we are going to create the URL Field to be added to the Page Layouts of your Projects that will Launch the External Project View.
1. Setup → Object Manager → Project → Custom Fields & Relationships → New
- Type: Formula
- Field Label: External Project View
- Field Name: External_Project_View
- Formula Return Type: Text
- External Project View (Text) =
HYPERLINK(‘URL?id=’ & id, “External Project View”) - Make sure to add the Field to your Project Page Layout(s)
Add your Company Logo to the EPV
Step one: Add your company’s logo to Salesforce. In order to do that, you have to switch to Classic and access the documents tab. The document Tab is not available in Lightning.
- Switch to Salesforce Classic
- Open Documents → Select New
- Name your document
- Check “Externally Available Image” box
- Select the File
- Click Save
- Copy Image ID from URL (You will need this for step two.)
![]()
Step Two: You can switch back to Lightning if you would like. Open the setup menu and follow the instructions below:
- Setup → Custom Code → Custom Settings
- Click “Manage” next to Cloud Coach Branding under the Namespace Prefix CCMI
- Click “New” to add image
- Paste the Image ID from step one into the Header Image Field
Hi, link here gives 404
1. Gantt and Project Tabs: Displays a Gantt (timeline) or list view of Tasks based on their start date, task duration, and dependencies. Users can move between tabs to find different types of information. Configurable by the Site field set on the Project Task object: *Configure External Project View List Tab*
Thanks for letting us know! That should be fixed now.
I had to replace single quotes with double quotes in formula: HYPERLINK(‘URL/externalprojectview?id=’ & Id, ‘External Project View’)
Glad you found what worked in that formula!
Here’s another broken link:
Next Steps:
View Configuring External Project View Details Panel
Thanks for letting us know! This link has been fixed and should be directing you to another article now.