Professional Version – 2.302
- Timecard
- Overview
- New Objects
- Time Entry
- Timesheet
- Permission Set
- Cloud Coach Professional Licensing Users
- Custom Settings
- Approval Process
- External Project View
- Basic Configuration
- Branding
TIMECARD
OVERVIEW
Project team members can track administrative or project time spent. Regular time tracking is considered a best practice to increase accuracy in future task duration estimates by creating historical data, improve project transparency, and enhance user accountability. Time entries are made using the Timecard tab in the Cloud Coach Milestones app. There are several sub-tabs to help users enter time using different views based on user need.
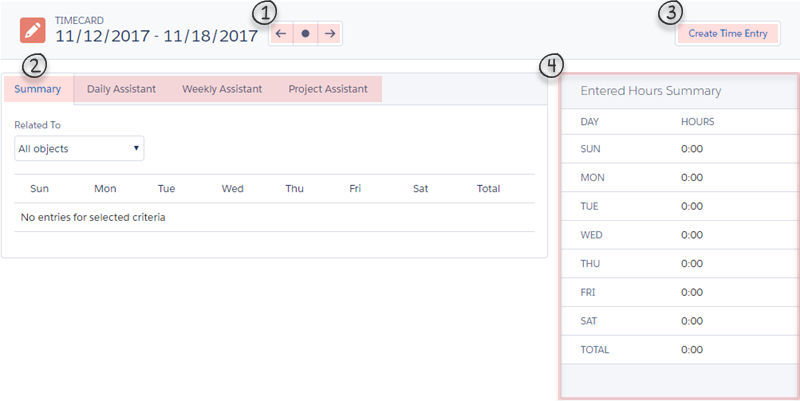
1. View Settings: The left scroll arrow displays the previous week. The right scroll arrow displays the next week. The circle button displays the current week.
2. View Tabs: There are several views for adding time to time cards; Summary, Daily Assistant, Weekly Assistant, and Project Assistant.
3. Create Time Entry: The “Create Time Entry” button allows for the creating new time entries. The “Create Time Entry” overlay’s fields are driven by a customizable fieldset.
4. Entered Hours Summary: This panel summarizes daily time entries for the week across all objects that a user has entered time against.
Read more: Timecard (Cloud Coach Professional)
NEW OBJECTS
Time Entry Object – Record time against an object, create a lookup to any object to start recording time against that object.
- Configure Quick Entry field set to streamline time entries on the Timecard.
- Create reports using the Hours (number) field
- Administration field is an editable picklist that shows in the Daily/Weekly Assistant, for use when entering non-project related time such as Paid Time Off (PTO), Sick Time, Training, etc.
Timesheet Object – Records the total hours entered for the week. Needs no additional configuration.
PERMISSION SET
There is a new Permission Set that must be assigned in order for users to access Timecard.

CLOUD COACH PROFESSIONAL LICENSING USERS
Using the Timecard requires licensing for each user. Users can be assigned a licence in bulk or individually.
To license an individual user, go to Setup → Manage Users → Users → Select an Individual to edit
- Scroll down to Managed Packages and click Assign Licences
- Check the box for Cloud Coach Professional in the Unassigned Packages section for the user, click Add.
- Click Save
To license users in bulk, go to Setup → Installed Packages → “Manage Licences” for Cloud Coach Professional
- Click Add Users button
- Check Action box for desired Users
- Click Add
CUSTOM SETTING
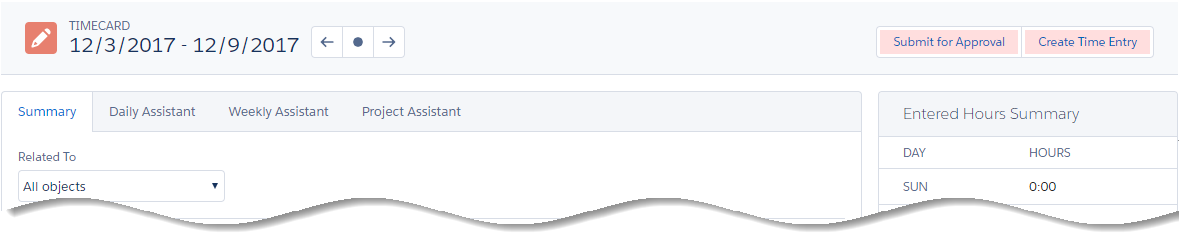
In order to customize how time is entered and approved, custom settings can be applied. Those settings enable “Hide Create Time Entry” and “Show Submit for Approval” buttons to display on the Timecard
To add these buttons to the Timecard view, access the Custom Settings from Setup, and select Configuration Options. Depending on if this is the first time accessing this page or not, there will be different steps from this point.
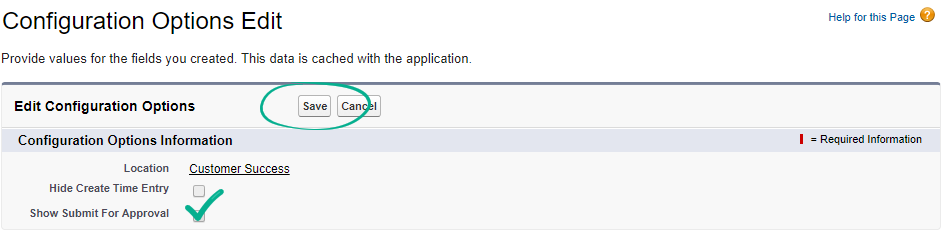 First time editing these configuration options: Click Manage → New → Save → Edit:
- Create Time Entry: to display this button, uncheck the “Hide Create Time Entry” (FALSE)
- Submit for Approval: to display this button, check the “Show Submit For Approval” (TRUE)
- Click Save
For more detailed step by step instructions, please see Timecard Custom Settings
TIMECARD APPROVAL PROCESS
Adding the Submit for Approval button to the Timecard requires an extra step; an active approval process on the Timesheet object. The Status picklist on Timesheet is an editable picklist so if additional values are needed they can be added. The criteria for the Approval process are:
- Timecard object
- Approval Process must change from Active to Submitted
- Status of Submitted or Approved lock timecard from editing/entering time
For more detailed step by step instructions, please see Timesheet Approval Process
EXTERNAL PROJECT VIEW
OVERVIEW
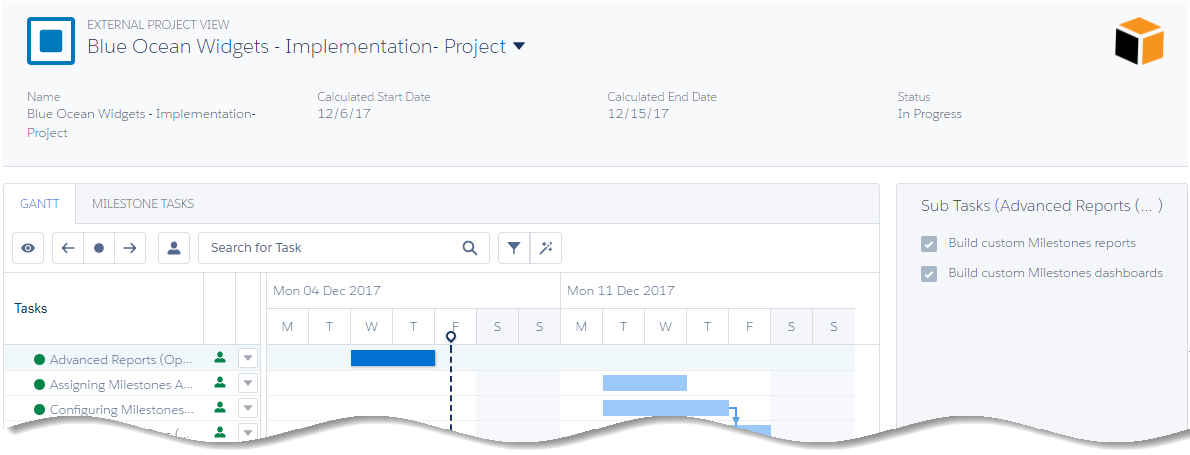
The External Project View allows project information and details to be shared outside of the project team. This view can be shared to project team members like stakeholders, sponsors, or clients who do not need to edit projects, mark tasks as complete, and track time but still need to see overall project completion. The External Project View includes tabs for Gantt and Milestones Tasks as well as Sub Tasks in the side panel.
BASIC CONFIGURATION
Configuration of the External Project View includes:
- Creating a Permission Set
- Creating a Site
- Creating aURL
- Branding Page
For more detailed step by step instructions, please see Configure External Project View
Leave A Comment?