OVERVIEW
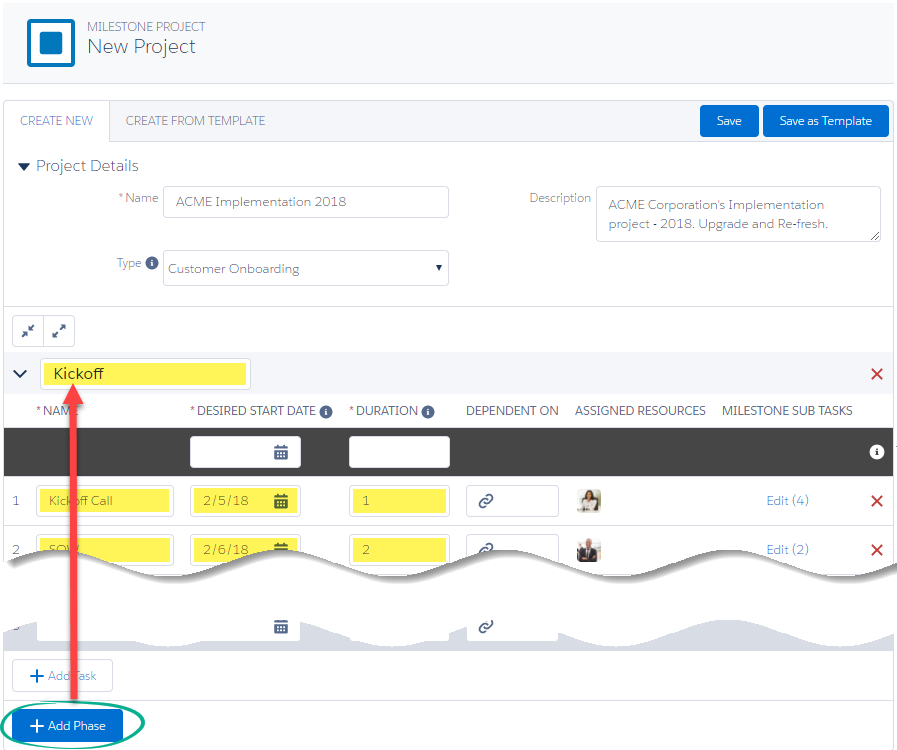
Phases — available exclusively to Professional users — can be added to projects at the point of creation for new projects or editing during the process of editing existing ones. For new projects, it will be as simple as clicking the “Add Phase” button and providing a name. Existing projects have a couple of different points to enter phases and to nest tasks under.
ADD PHASE TO NEW PROJECTS:

- Click on the ‘New Project’ button
- Enter your Project Details (Name, Description, etc.)
- Click on the ‘Add Phase’ button
- Name your Phase and proceed with adding tasks as needed
- Repeat adding phases as needed
ADD PHASE TO EXISTING PROJECTS

- Add the Phases Related List to Projects Page Layout (‘New Phase’ button will be added by default)
- Choose your project and go to Details page
- From Details Page, find the Phases related list and click ‘New Phase’ button
- Enter a Phase Name and click Save
ADD EXISTING TASKS TO A PHASE

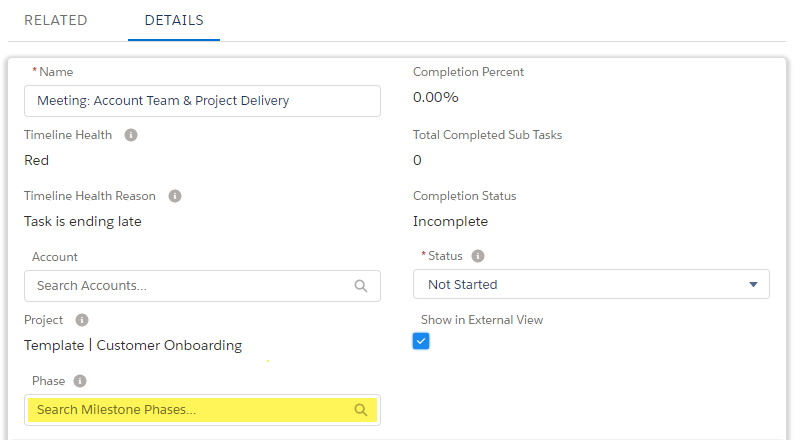
- Add the Phase lookup field to the Project Task page layout
- Choose your project and then go to the Task Details page
- From Details page, click to edit the Phase lookup field
- Either add a new Phase or search for and existing Phase and click Save
- Repeat as necessary
Next Step: Read the Project Hierarchy user guide.

Unclear from this article whether Phases are included in all packages or just in Professional and above
Thanks for the feedback, Warren! The article has been updated. But to answer your question, Phases are not currently available to Milestones users without the Professional upgrade.
Let us know if you have additional questions!