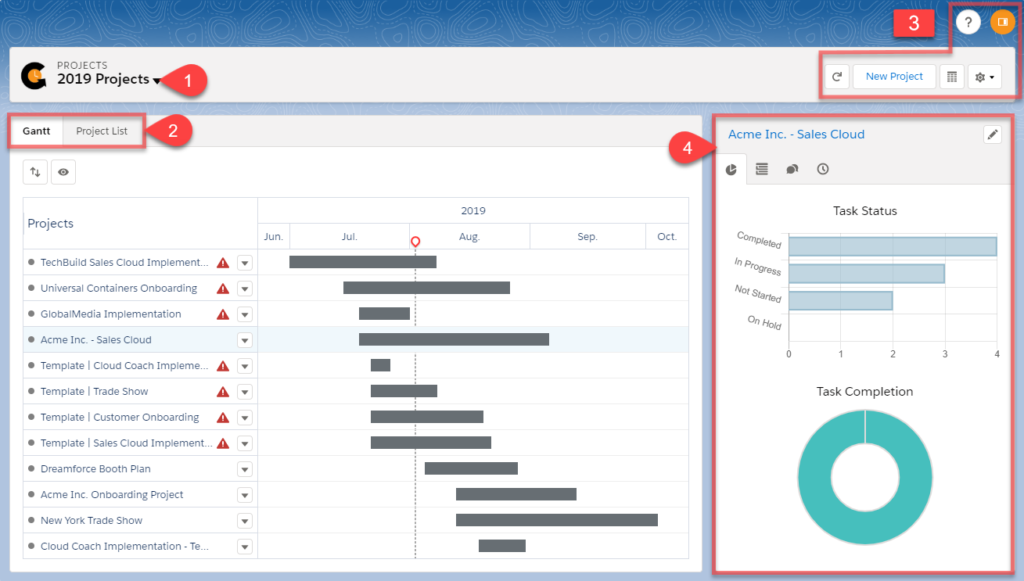
1. List views – Filter the Cross Project Gantt view using Salesforce List Views.
– NEW: Favorites – Flag project as a “Favorite” to selectively display projects in this view.
2. Gantt – Displays projects filtered by selected list view in a Gantt view
– ![]() Sort: Ascending/Descending by Date or Project Name
Sort: Ascending/Descending by Date or Project Name
– ![]() View Options: Fit (default), Week, Month, Year, Day, Quarter
View Options: Fit (default), Week, Month, Year, Day, Quarter
Project List – Displays projects filtered by selected list view in an editable table
– Column Headers controlled by custom field set on Project object. A custom field set must be created with the API name “column_headers” and can be prefixed with the name of a record type.
Example: If there are project record types named IT and Professional Services, respectively, column headers displayed for these record types can be different using the naming conventions “it_column_headers” and “professional_services_column_headers”, respectively.
– ![]() Filter: Filter by field using Quick or Advanced Filter options
Filter: Filter by field using Quick or Advanced Filter options
Action Arrow (Project Name Column) = jump to Project’s Timelines, Summary, Resource, Documentation, Controls, Financials sections.
– ![]() /
/![]() Favorite Project Flag – Click icon to flag/unflag a project for display in the “Favorites” list view option. Controlled at the user level. Each user can flag projects based on their own preference and need.
Favorite Project Flag – Click icon to flag/unflag a project for display in the “Favorites” list view option. Controlled at the user level. Each user can flag projects based on their own preference and need.
3. Project View Controls:
– ![]() /
/![]() – Collapse/Expand Cross Project Gantt side panel
– Collapse/Expand Cross Project Gantt side panel
– ![]() – Refresh page
– Refresh page
– New Project button – create a new project in the Project Creation Wizard
– ![]() button – Switch view to standard Salesforce list view
button – Switch view to standard Salesforce list view
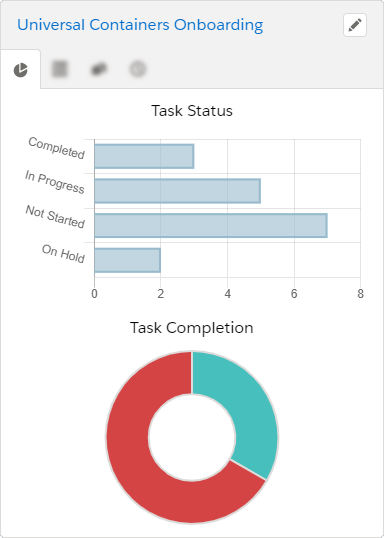
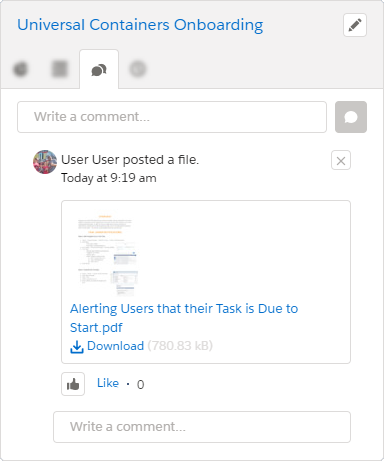
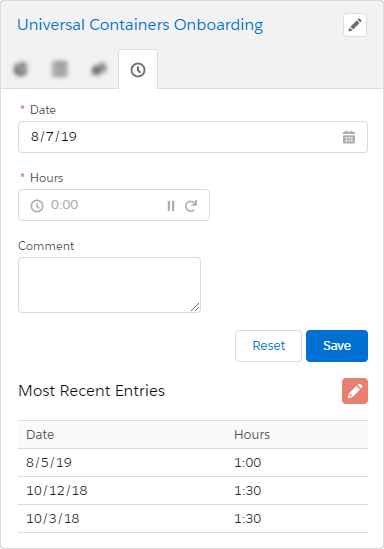
4. Side Panel – Charts, Project Details (editable in line or overlay using ![]() icon), Chatter, and Time Entry tabs available
icon), Chatter, and Time Entry tabs available
– Side panel Details tab fields are controlled by custom field set on Project object.
Example: If there are project record types named IT and Professional Services, respectively, fields in the Details side panel tab displayed for these record types can be different using the naming conventions “it_sidepanel” and “professional_services_sidepanel”, respectively.
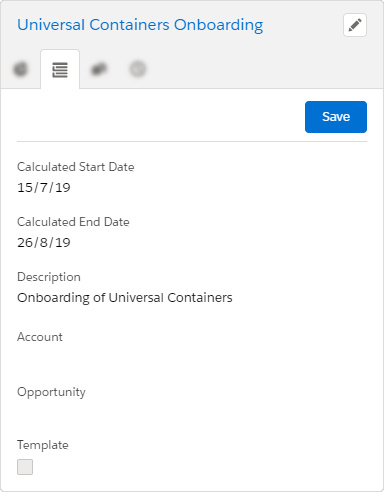
The Details tab displays pertinent project fields found on the project detail page. Fields in this set can be added and removed by an Administrator. Depending on the permissions of the user and the type of field, standard and custom fields that have been added to the field set can be manually edited directly in the panel. Record Types are supported.
Fields that are editable have a ![]() icon to the right as when hovered over. The user can make changes to the fields on the fly.
icon to the right as when hovered over. The user can make changes to the fields on the fly.
Leave A Comment?